Saturday, January 30, 2010

Meal planning my style

Lately there has been a lot of focus about getting the most from your dollar and spending wisely. Well I'll admit that I'm not a perfect planner on buying food or coupon shopping or running around town getting the best deal. I am getting better at trying to use what I have.

Couple things to note before I begin. One - I live in the Suburbs, so I don't have a farm or access to go planting areas (much less livestocks etc). I am going to try this summer with some veggies in some beds we built last year. We just bought this house in 2009, and our old house was on the market for a year - so we never tried a veggie garden (plus we had WAY to many rabbits at the old place - good sun though). So I missed some early chances to get some growing of food going. If I have trouble I have some friends I can barter with and I know of many local sources starting up Two - I also am known for bulk food buying, which you will see in a bit. And three - I have gotten better at freezer meals which helps my planning. And four - I'm going to start learning about canning this year (one of my mini goals)!

One thing I have found lately is I need to do a better job at writing down what I want to cook each day. I find that we don't eat out as much when I plan ahead. We also don't eat as many carbs. We don't go out as much (except our planned Fridays and right now Pizza Wed due to a ballet class at 4:30p). I also can limit leftovers better and do more cook for one day and use in another meal the next - ie when I do Chicken. But I can also plan for my husbands lunch if there is not as many leftovers and he doesn't eat the same thing for 3 days. I will note that from most meals I plan on making just from me and husband. Our daughter likes some meals - but we don't stress about her (shortly I will start making her eat with us).

First buying meat. I usually buy our beef at our local butcher. I can get a boneless assortment and 25# of ground beef for about $350. Now this may seem high - but there is only two adults and one small child eating this and I can usually only buy twice a year. I will pick up boneless chicken breast at Sam's or Meijer on sale and I buy pork chops, ham or ground lamb to break up the beef. I also buy some items at My Menu, a small store of prepacked items that are made striaght from the freezer. I am mainly doing this because my daughters school gets money once a month when you buy from there. This helps break up what I can make.

Beside the meat I do freezer meals. When I make a meal like spaghetti, sloppy joe or taco I take 3-4 # of ground beef out of the freezer to brown. After I mix in the sauce/seasonings I separate out the servings into gladware containers. These have been good for stacking in the freezer and hold 2-3 cups per container. I know some use bags and flatten them - but I have a full upright freezer and room to spare. So can usually find many easy meals in the freezer to break up my cooking.

 I also have a recipe for meatloaf that uses 6# of meat and I can make 3-4 loafs out of. And I have a recipe for ham loaf that makes 2-3 loafs (more if I make mini loafs so we have less leftovers.) I also have tried premaking lasagne with the no cook noodle recipe - that works great because it is time consuming to make and easy treat when you can pull it out of the freezer. We use to have in town (before the recession) a couple of meal prep places. I learned some great things there about doing meal planning. So I some times can take a favorite and find a way to make it a freezer meal. Keep in mind - I don't take a weekend to make 30 meals, I find that with some pre planning I can take what I buy and starting building up a set of meals that I can pull from.

On to planning - I make a list of all the meats and meals in the freezer. I need to get a list down of possible meals to pull from - but that will come. Them I sit with a calendar and start putting in meals. Example last Saturday I made Spaghetti - and it was a time that I had to restock my sauce.
 (Note - I only have one big burner so I make my sauce and then have to heat the noodles, so I love having premade sauce that can be heating in the micro). So that day I took 3# of meat our and made 5 contianers of sauce (4 to freeze and 1 to eat). So some time in the next week I know I can have spaghetti again I and I know sauce is ready (so it can be a weekday meal).

 I do keep in mind that if it a recipe that needs time, ie stews and heavy meal prep I keep it to the weekend. If I make chicken breast one night I can plan to make extra and then plan a pasta meal with chicken the same week. Also I keep a number of frozen veggies on hand, but if I plan something like Stirfry I know I need to make a fresh produce shop. As I plan I will make a list of any pantry items I need, so I can save time. I will say when I pla more more - the less we have of hamburger helper!

Back to the list - When I meal plan I also can have things days like steak night - but know one week it is filet and one it strips steak  etc. I also can not feel like we have spaghetti every week - because I can space it better. So right now as I plan I can have a steak (at least 3 meat choices), a chicken night (or lamb, or ham), pizza night (due to activities), a ground beef night, a going out night, a meal prep night (to get ahead on meals) and an easy night (meatlaof, premade meal etc). Right there are 7 days and if I have a list in front of me I can vary the month so I don't feel like mine eating the same things. I also know I can shake things up with a breakfast dinner or something special. If I have recipes in front of me I can try new things - or remember a favorite that I forget about in the rush of things. Example last weekend I also made Ham loaf from leftover Christmas ham and ground pork, last year because we moved at Easter our leftover Christmas ham was used at Easter and I didn't make ham loaf - it sure tasted great!

As you can see from my ramblings you can make things easier with out buying and cooking in one weekend for a whole month. If you can look ahead a little, you can plan a little. I will note again I do only have one child and not a lot of extras yet. I like to think I can keep it easy, but I know life gets in the way. Either way I know what I need out of the freezer tonight for tomorrow and it will mean my day will be a little easier during the witching hours!

Easy Garlic bread - This was how my mom made it - but she used french bread. I hate remembering to buy bread the day I make spaghetti or such.
One Hoagie bread (I buy a six pack from Sam's Club for $3.84 and keep in the freezer.)

Defrost and cut 1" slices diagonally through the bread - leaving a little still attached at the bottom.

Mix 1/4 cup melted butter and some garlic powder (or garlic salt to taste)

brush the slices with butter mixture and any extra brush on the top of the loaf

and wrap in aluminum foil with the top open.
bake 350 degrees for about 15 minutes.
Take out, break apart and enjoy!!

Thursday, January 28, 2010

crazy feelings

I love the way people and items are getting linked everyday on the internet. I have had some great experiences recently. Since some of the craft blogs are doing a weekly links to projects I have gotten some people to my blog and I have found some amazing blogs and ideas. I was listed last week in Nettacow blog about my towel skirt. I was blown away. I know this will happen more and I'll be linking more as well, just so I can keep track of all the great ideas I'm seeing and want to do. I might have to start a sidebar on projects I want to do.

I then had an interesting experience on Ravelry. I love the favorites and comments I get on projects I do there which is great. I have also friended some people - because I know them or because I want to follow there work. I haven't tried to friend any of the "big names" on the site, I prefer to stay in the background, but if I stumble on their work - great! Well I had friend request yesterday that blew me away. Now it isn't a famous designer, but it is an author. Barabra Bretton friended me !!! This is a gal who I have read some of her fiction books and I'm following her current series that takes places in "supernatural" town with a yarn shop. It just amazes me everyday how small the world is getting. Which reminds me, one of these days I need to upload pictures of me with "famous" people. I actually have some interesting stories to tell.

I forgot one other funny that happened this week. I was hanging out at a friends house with our MOMS Club group, and it was time to go so us moms were doing a quick pick up. A friend turned to me with a bowtie pasta felt food piece - and said "hey look at this, you could totally make this", to which my other friend and I replied - "I did". My one friend though the other friend bought them! I can chalk it up to another moment where I need to start building my craft fair items back up!
Off to other things. I'll be getting some post together shortly. I think tomorrow I'll start on some of my meal planning and money saving ideas - since Frugal Fridays abound!

Happy crafting.

Wednesday, January 27, 2010

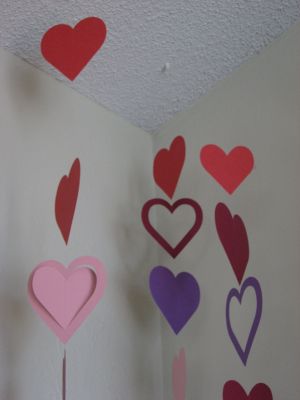
some of the Valentine's day ideas I love

Heart garland from Skip to My Lou


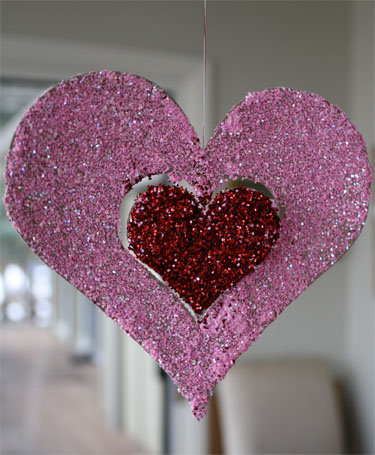
Glitter hearts from Skip to my Lou

I have started playing with this on ealready with my daughter. We were in the craft room at 8am this morning getting a layer of paint on ours - because I have some valentine glitter glue that I want to try. I love the idea of using my cricut and the idea of sewing the hearts before painting. This will allow me to use the heart on the bead garland since I have "built-in" hangers. I love it when things work to help you. Note for using the Cricut. I used my Deep cut Housing blade and holder on setting 6 to get the cereal box (or in our case fruit snack and cake box).


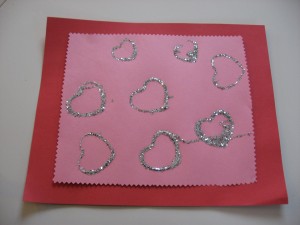
Glitter heart with cookie cutters from No time for Flash cards

I agree with this gal - in the toddler house of nothing looking recognizable it is great to use items to help them make shapes. I look forward to trying this project soon. I need to find where my "regular" glitter is, I have a lot of glitter glue.

I'll lok for more ideas - I love what I'm seeing and with only 18 days out - I'm running out of time. I'll need to post in the next few days what we did for our MOMS club valentine's day party last year.

Monday, January 25, 2010

Valentine's Decor part 1

We are starting to get into Valentine's Day decorating. This year I'm hoping to more crafts with K, so I hope to have more posts as I go.

My first part is a Christmas clearance meets Valentine's day. I saw during the holiday season a cute idea using doilies as snowflakes. (I wish I remembered which blog I saw it on) I knew I wanted to use the idea for Valentine's day since there is always heart doilies available. Well I was also seeing a lot of bead garland on clearance at Walmart with cute snowflakes in the garland. So I decided to combine the two.


I decided to hang the garland like rope around our fireplace to start. Then I tape doilies to the garland. What I like about the idea is as K and I make more hearts we can hang them off the garland by tying string and letting them hang down - using the beads to help anchor and separate the hearts. I also picked up the garland in a green so I can make some decor for St. Pat's Day and Easter.


Looking for more hearts!!

I need to add I spent about 75 cents for each garland (I bought 2 red and a green and a pink)
I found the doilies at Hobby Lobby for $1.47 for the plain 6" hearts and I did find a package in the Target dollar spot. I have plans to add garland around our one window in the family room and MANY more hearts!

Saturday, January 23, 2010

Cricut project #1

I wanted to go through and start posting some of the cards and such that I have made using my Cricut. I will add right now I only have the orginal Cricut. I got it about 3 three christmases ago - but from April 08 till April 09 alot of my crfat supplies were packed while we tried to sell the house. So it has been since April 09 that I have been able to get only on my many projects - hence a lot of craft goals to get the many projects I have worked down.

So first project I'm posting is an Address Book. This became the Aha moment of my Christmas 2009 crafts. My husbands grandma is 87 years old and doesn't need anything. Well, when we were visiting her for Thanksgiving she had off handedly mentioned that her address book had just broken. So I grab the idea and went with it. I know how hard it is to find address books these days - since most of us keep things on the computer, and many address books these days have small lines and more info than people without computers need to fill in. So I decided to make a custom printed address book for her.

I first found some 5x8" tab dividers - since I felt that this was the right size. Then I was worried about finding a binder. Then the first Aha moment came. I had bought a binder years ago at Michaels that fit 5x7" page protectors - to hold the itty bitty paper pad that Provo Craft carried for while. The binder was plain white and I hadn't decorated it for any other use (lucky me - and stash busting my crafts). I then looked through my papers and found a paper pack of light papers that matched her decor and some ribbon in my stash that matched it!! As you can see this is coming together nicely.

Then to come up with the address pages. I was able to design on my word processing program and one page design that could be folded to make a double sided insert. To personalize this even more - I typed in the address and phone numbers for the family, kids and grandchildren with pictures of each group with their address. I also customized the tabs so that names she doesn't have alot of are grouped together and letters like "c" are their own tab.

I used the Cricut to cut the words Addresses for the spine and cover. My only regret for the project is I didn't ink or chalk any of the pieces before putting it together. I was focused on the project and had to get it done quickly. I used my Opposites Attract caritidge - with the upright curvise font.

Here is the cover

the spine and front. Since this was for an 87 year old woman - I kept it simple. The ribbon is used on the seams. I used my Zyron for the adhesive.

Here is what one of the pages looks like with the pictures added.

and here is what two pages side by side look like.

I'm happy with the creative result. I love that was able to make a very personalized address book without spending a lot of money - and was able to use stash supplies!!

Friday, January 22, 2010

Losing track of time

I was looking at my goals for 2010 and realized I'm falling behind already!! I haven't blogged as much -- but I do have some things lined up to go I just have to upload more pictures. I wanted to get a Valentine Decor up this weekend - but of course I'm seeing more ideas than I can do.

I also went ona little yarn spending spree this week. Every year so far for K's birthday I have knitted her a dress. Well birthday number 4(!!) is coming up and I'm out of good yarn in my stash for a dress. Mind you this summer she will be a getting a striped dress I think with some odds and ends - but her birthday needs a different look. My husband likes one dress I made for her about 2 years ago.


Here she is wearing it as a 2 year old.


Here she is wearing it as 3 1/2 year old

You can see one reason we still like the dress, it has become a great sweater. Well K picked out a great purple yarn so I can remake this dress, but the yarn I used for the ruffle is actually leftover yarn from a project I did 20 years ago!!! Needless to say - no longer available and there isn't a great subsitute yarn currently available. Well I was playing on Ravelry getting ideas when I researched the old yarn and found someone in CA with 17 balls in their stash!! I email the guy and he was willing to part with the yarn. So Happily/sadly I can say that I have 17 more balls of yarn coming into my stash. At the same time I can say - that it is harder to get full projects out of my stash and I have worked it down  A LOT. I have some ideas to play with this year and some yarns will make into my daughter crafts supplies to be used up. I can't wait to see out the new dress turns out.

Also this week when we were out running errands I was happy to hear K tell people proudly that Mommy made "     " item that they were admiring. It is great to see that she enjoys the items I make for her and she proudly wears them. Which reminds me I need to take a picture of the well worn halloween costume from Halloween 2009, the poor thing is being well worn out - to the point I wouldn't be able to resell it or give as a hand me down.

I look forward to getting more posts up soon!

Friday, January 15, 2010

Snowman Party

It January and cold and was a hosting a playgroup this week. I love having playgroup - but we are starting to get a few older kids. So I'm enjoying coming up with fun ideas for the kids to enjoy as a surprise during the playgroup. This week since It was cold I was thinking about snowmen. Our last snow fall wasn't the greatest for snowmen, but the kids made some a few weeks ago. I did Sloppy joes and cheese and crackers for lunch. I also had been having a craving for Puppy chow (Chex Mix Muddy Buddy or what ever you call it). So I made some Puppy chow - but since we had a snowman theme going I told the kids it is was snowman poop!

I first came up with a fun game for the kids. I converted a diaper box into a quick toss game. I have all the materials except beans for the bean bags. What is nice is I can reuse the bean bag and then recover the box for other occassions.


Supplies --
one box of choice, paint of choice ( I used house paint and craft acrylic and paint pens (for details))
assorted felt and chipboard (for the hat)
glue, scissors, and extaco knife
scrap material and dried beans

I painted the box and drew the circles for the snowman ( used our dishes for the circles). Since these are for little kids - the hole is fairly large. If you had a bigger box, you could get more holes.
I cut the hole after the paint - so I knew where I was going with it.
I made the hat out of chipboard covered with scrap felt and glued it on the box.
I poked holes at the neck for the scarf.

For the bean bags I cut my material 6" square and sewed a double seam. I filled the bag half full of dried beans. Have a piece of paper or a funnel to do this. and then sewed the seam shut.

The kids enjoyed it for the short attention span they have. I know it will be used more.

For the extra treat of the day - I made rice krispie snowman to decorate. I had some old Wilton Snowman Single pans for the shape. I did one batch of Rice krispie Treats and was able to get 8 snowman. I went through the treat cupboard and was able to find candies to decorate with and only had to buy the stuff for the hats and buttons (and I really didn't have to buy the buttons).


treats before decorating


Pretzel arms, mini oreo buttons,
candy corn nose, M&M eyes, licorice scarf and mini peanut butter cups and fudge stripe cookies hats.
I had a little leftover frosting that I melted for the glue. I premade the hats - because we had 3 and 4 year olds. Due to illnesses I only had 4 kids - BUT they had a blast!


My sample for them to use for ideas.

I loved the craft and I'm looking forward to my next playgroup for more ideas!


Friday, January 08, 2010

Dollar spot towels

Back in October I ran across a great idea from treasures for tots using some towels from the target dollar spot. Well at the time K wouldn't wear the one I made for her (maybe next year). Well New Years Eve I was looking for a quick party favor and instead found the spring/valentine version of the same towels.


Well K recently became more into skirts and I decided the towels would work as a quick skirt. Of course it helped that the first one I chose to make was the blue-ish one (since we are in a blue faze).


gotta love cheezy grins!


I only ended up using 1 1/2 of the towels. and of course was excited and didn't take pictures - but will add soon since I did get two sets of towels


So you need the waffle weave towel set from Target (or any two towels that are as long as you like)

Elastic

Scissors

sewing machine

and other basic sewing supplies
I took both towels and cut them in half (through the center fold over). I made sure that I had three even pieces to sew togther. I planned so the cupcake design stayed in the front and the two plain sections went on either side of the cupcake piece, with them being seamed up the back make the base of the skirt. I did do a quick zig zag on the unfinished sides of the towels before sewing together. I didn't un do any of the towel hems (because I didn't want to "re hem" the skirt). after the zig zag, I sewed the pieces together as described above. Then I loosly measured a 1/2" to 3/4" inch fold over - so I could make a casing for the elastic. I only made it big enough of my elastic on hand - if you are using a 1/4" or so elastic - you could make two slots for a stronger elastic waist band. I kept this version simple - because I didn't know if she would wear it.


The good news is since you only used three of the four halves of the towel - you still have the part with the other cupcake. You will be able to this embellishment to decorate the shirt or make a bracelet to match. I plan on adding it to the shirt - once it is out of the wash again.


another look with another color shirt and tights.


I'm looking forward to making another skirt and will take more pictures as I go.